With pixfort Divider Builder you can build stunning and awesome dividers in no time! Below you can learn how to add dividers using WPBakery or Elementor page builder.
Divider Shape in Intro Section
To customize the divider shape in the intro section (the top part of the page with the title and breadcrumbs) please check this article:
Customize page intro section

Adding dividers in WPBakery
Adding beautiful dividers in WPBakery is very easy, you can add dividers to Sections or Rows, or you can use the Dividers element from pixfort Elements.
Adding dividers to Sections and Rows
To add dividers to a section or a row, just open the Options Panel > Top or Bottom Dividers and then you can add top or bottom divider. You can choose the divider layout, number of layers, colors, animations, flip, height…
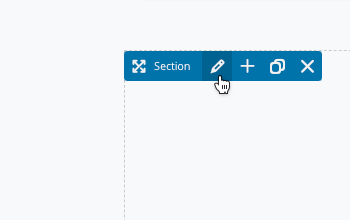
Open Section settings
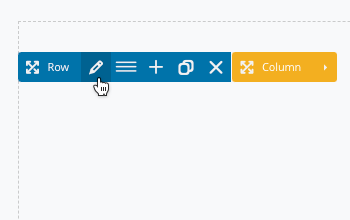
Open Row settings
The result: Top & Bottom dividers 🤩
- Note: if you want to make the divider full width, make sure to set the Section or Row to Stretch (Section/Row settings > General > Section/Row Stretch).
Adding dividers using Dividers element from pixfort Elements
Another way to add dividers is to use the Dividers element from pixfort Element, the element can be added anywhere in the page (Section, Row, Content Box, Highlight Box…) and it has the same options as dividers in Sections and Rows (Top and Bottom dividers, Layout and Styling options…).
To set the options of the divider just open the Dividers Options Panel > Top or Bottom Dividers and then you can add top or bottom divider. You can choose the divider layout, number of layers, colors, animations, flip, height…

Dividers element in pixfort Elements

Adding dividers in Elementor
Starting from version 3, you can easily add pixfort dividers directly from the Sections, Columns or Inner Sections Settings.
For example, to add dividers to a section/container, open the Section/Container Settings, then from the Top Dividers tap or Bottom Dividers tap you can choose the divider layout, number of layers, colors, animations, flip, height…
Example of adding bottom and top dividers to a section/container
Adding dividers using Dividers element from pixfort Elements
Another way to add dividers is to use the Dividers element from pixfort Element, the element can be added anywhere in the page and it has the same options as dividers in Sections Settings (Top and Bottom dividers, Layout and Styling options…).
To set the options of the divider just open the Dividers Settings Panel > Top or Bottom Dividers and then you can add top or bottom divider. You can choose the divider layout, number of layers, colors, animations, flip, height…
Adding bottom divider
- You can customize the position of the dividers by changing the value of Top/Bottom margin.
- Note: if the divider was over other items and you want to bring it backward (underneath other items), set the z-index of the divider to 0 and increase the z-index of other Elements/Columns.
- Note: if you want to make the divider full width, make sure to set the Section to Stretch, also set Columns Gap to No Gap.