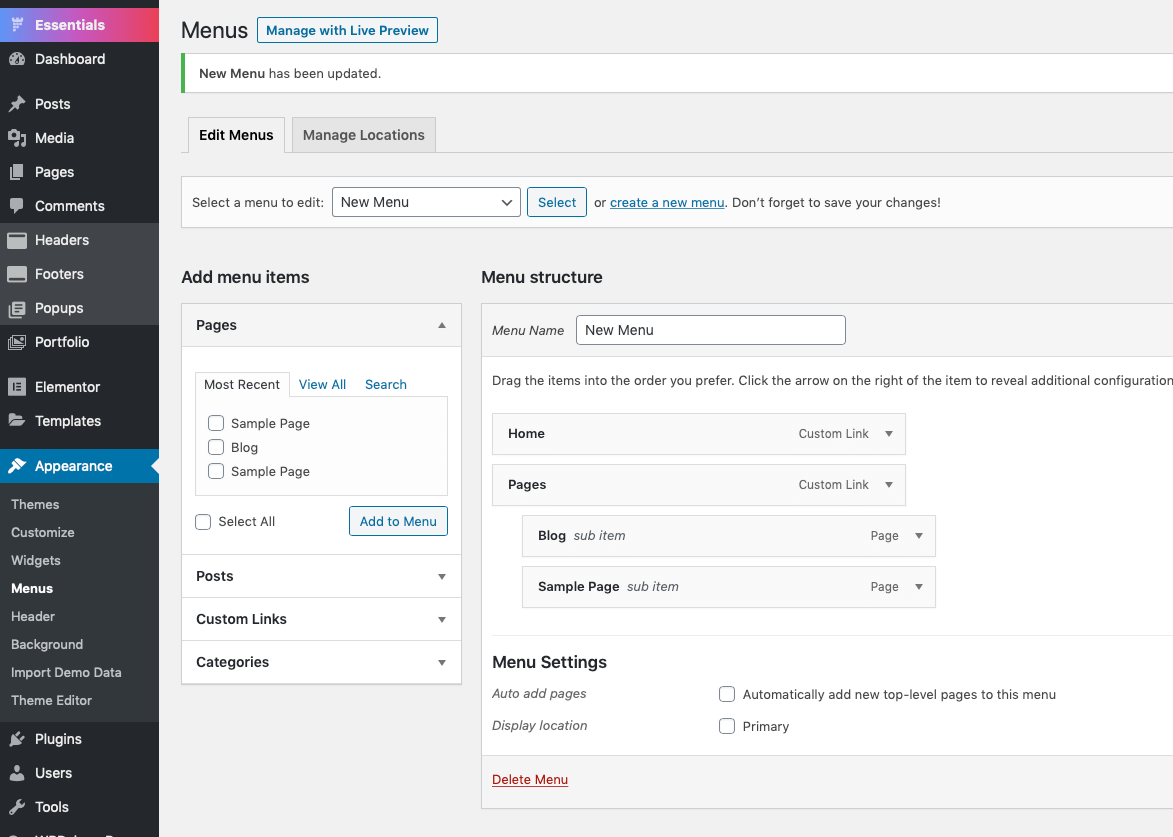
You can create or edit your menu in Essentials easily within the default WordPress menus page:
- WordPress Admin Panel > Appearance > Menus
Essentials comes with two types of menu layouts:
- The Default drop down menu,
- And the Mega menu layout which extended to fit the page container width which can include more complex styles (for example: banners, columns,…).
After creating the menus, they can be used in any website header (desktop or mobile or both) via the Header Builder, for more information on creating website header you can check this article.
Default Drop Down Menu
Default drop down menus are easy to build in WordPress, to create one just open your admin panel to the Menus page (Under Appearance tab in the left sidebar), then choose from the left area of the menu builder the elements that you want to add into the menu (for example: Pages, Posts, Categories, Custom links,…). After that, you can drag and drop the elements inside the menu to sort them, and to create a drop down menu, just drag any element to the right under its parent element, you can add multiple drop down elements and with multiple levels of depth (up to 3 levels of subitems).
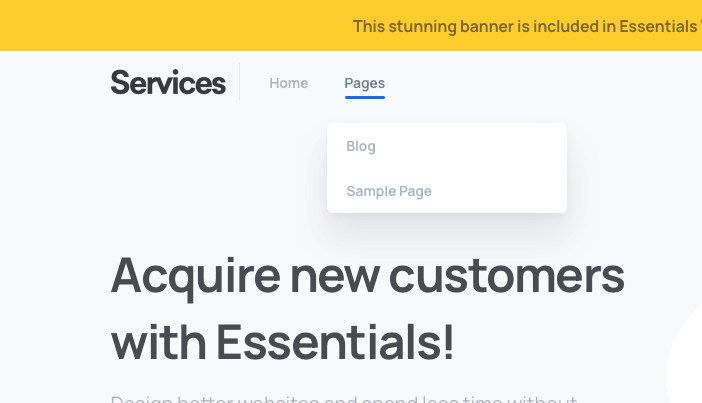
This is a simple example of a menu with two drop down elements:
And the end result of this drop down menu would be:
Creating Mega Menu
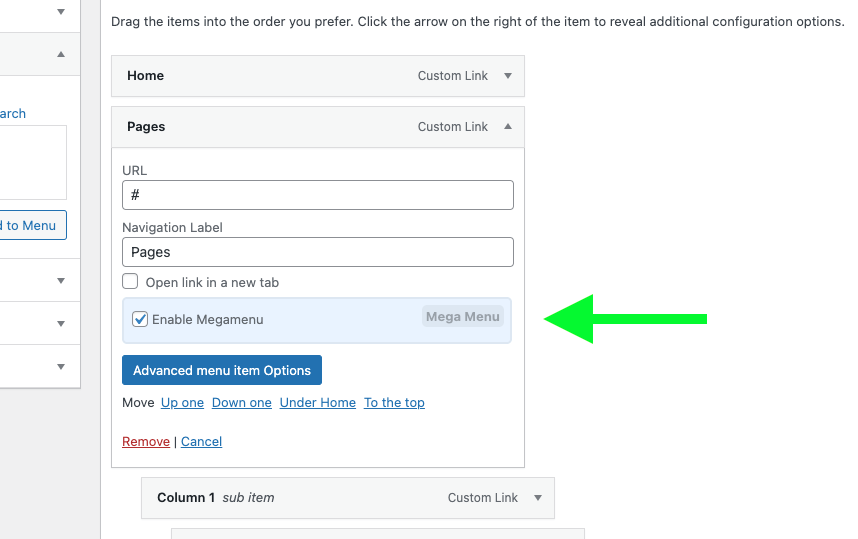
You can create Mega menus easily within Essentials theme using the default WordPress menus page, to do so head over to WordPress menu editing page in Appearance » Menus and then select the menu that you want to edit.
After that open the menu item (in the first level) which you want to have a dropdown Mega menu, and check the box “Enable Megamenu”:
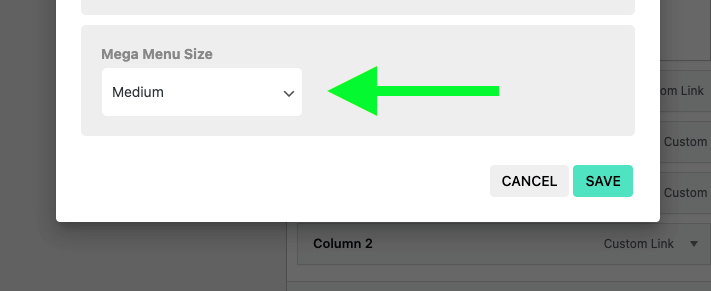
Mega menu size
Starting from v2.0.0 you can choose the width of the mega menu by clicking on the button “Advanced menu item Options” in the Mega menu item:
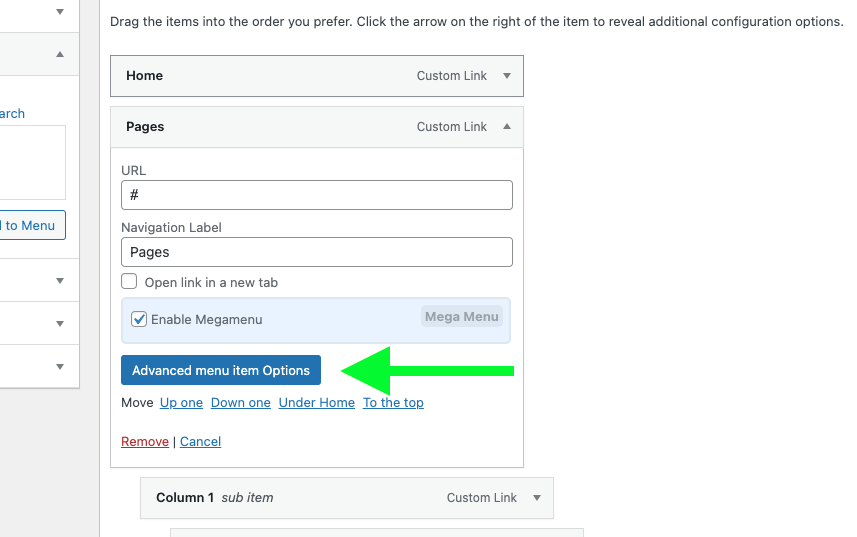
then “Mega Menu Size”:
Adding columns and links to your Mega Menu:
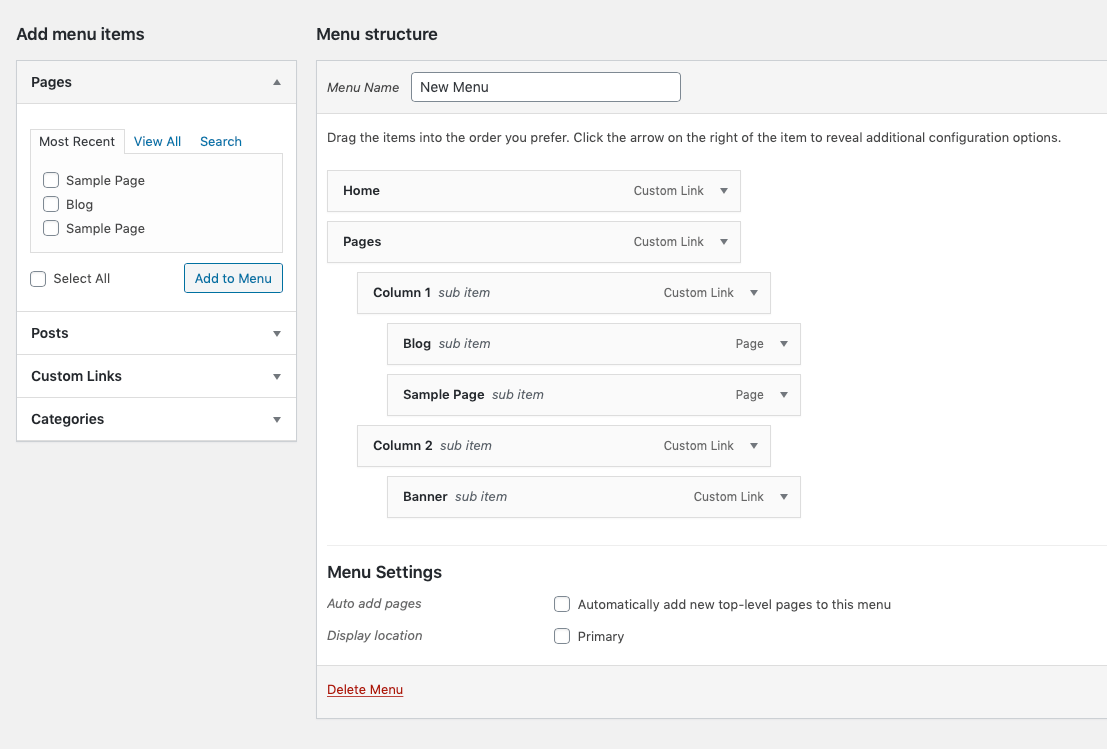
To add columns to your mega menu, add a custom link from the left area with a link as “#” and the link as the desired title of the column inside the Mega menu (for example: Features), and add this custom link under the main mega menu main item (as second level item), and check the box “Convert to column item”, you can also choose the desired column width of this column, or you can change the style of the column by adding padding or lines.
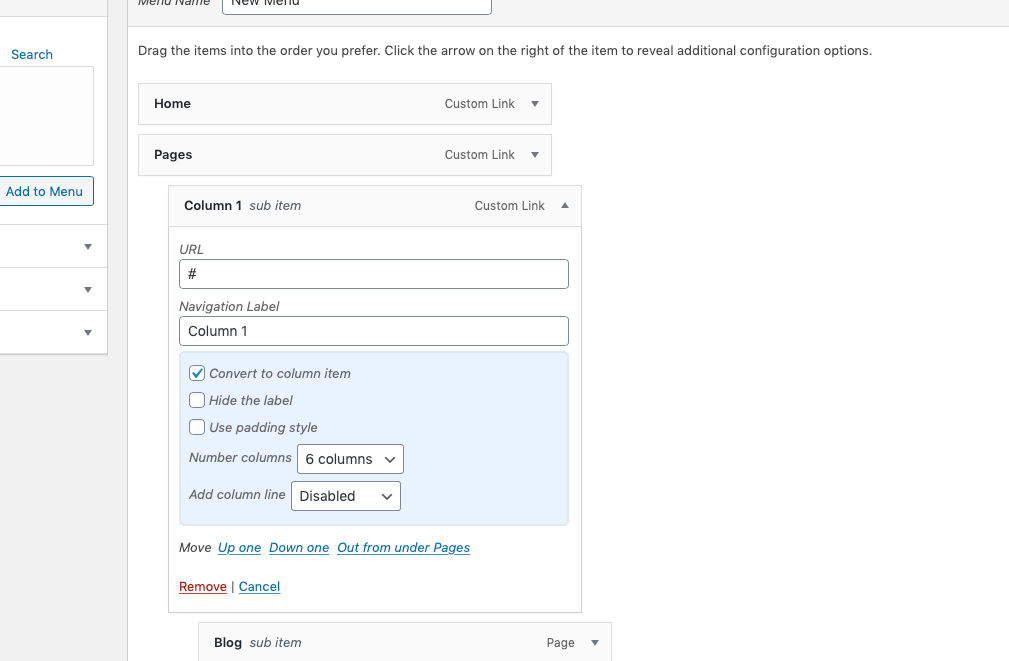
You can now add any number of columns with the same way inside the mega menu, and the columns can be in any different sizes depending on the style that you want to build.
You can set a title for the whole column via “Navigation Label” field of that column item in your menu (check image above).
After that you can any normal WordPress menu items under the column (as third level menu items) to show under it in the mega menu.
Note: the width of each Row in the Mega menu consists of 12 width columns, therefore, if you have multiple item columns and their total width is over 12 width columns, some item columns may overflow to a new Row depending on the available space in each Row.
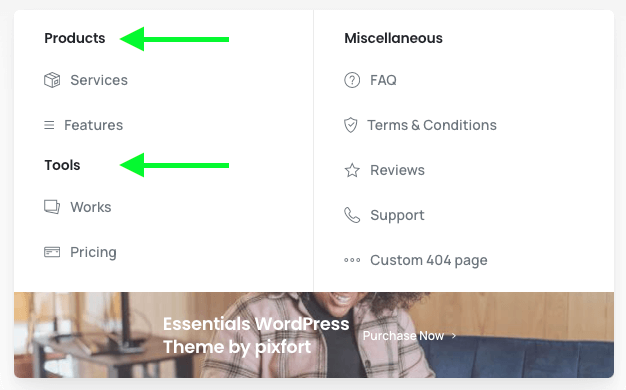
Adding multiple titles in the same column
As mentioned in the previous section, you can set a title for the whole column via “Navigation Label” field of that column item in your menu (check image above).
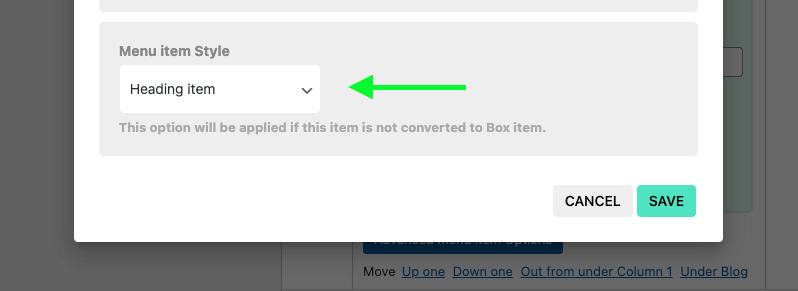
However, Starting from v2.0.0, you can add multiple titles in the same column, for example in the company demo menu:
You can do that by changing the style of any item in the column to be a Heading item from the Advanced menu item Options button in that item:
Adding icons to menu items
Starting from v2.0.0 you can add an icon to each item in your menu opening the Advanced menu item Options and then choose the desired icon:
Note: currently adding icons is only available for normal menu items (at the moment icons will not appear if menu items are converted to Box item).
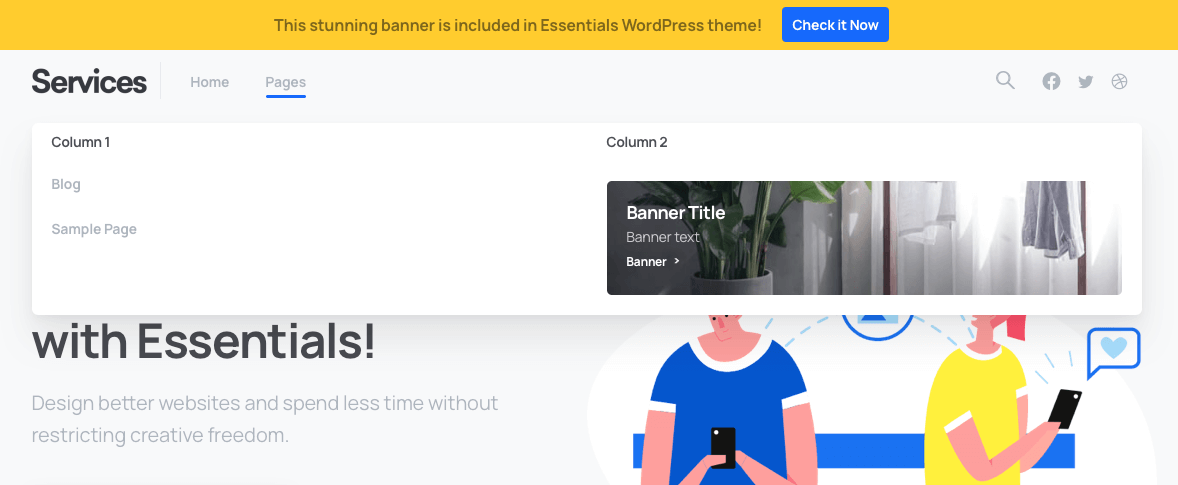
When you finish editing the menu, save the changes and the menu will be updated in your website. The result for the example mega menu will be:
To add video background to Menu Banners you just need to upload your video in MP4 format to your WordPress Media Library and then copy the link and insert it in the Background field in your Menu item (right-click on the background field to avoid opening the Media Library popup).
- It’s also possible to have your video hosted on external server, same as before you just need to copy it’s direct link and paste it in the Background field of your Menu item.
- Note: YouTube videos and other video services will not work.
Example of a Mega Menu with Video Banner
Below you can find an example of a Mega Menu with Video Banner (live demo in Original Demo).
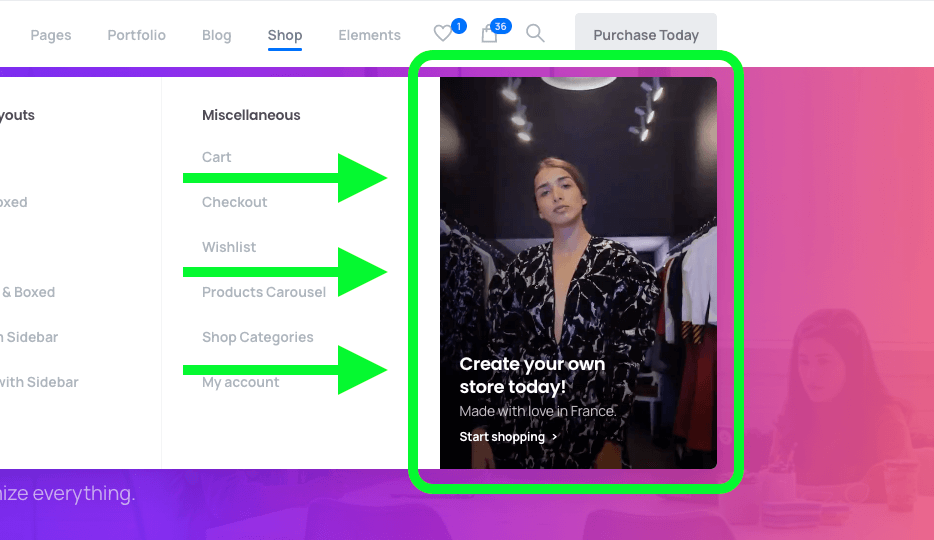
Video Banner in Mega Menu (Original Demo)
To create a Video Banner, you need to have a column in your Mega Menu, for example:
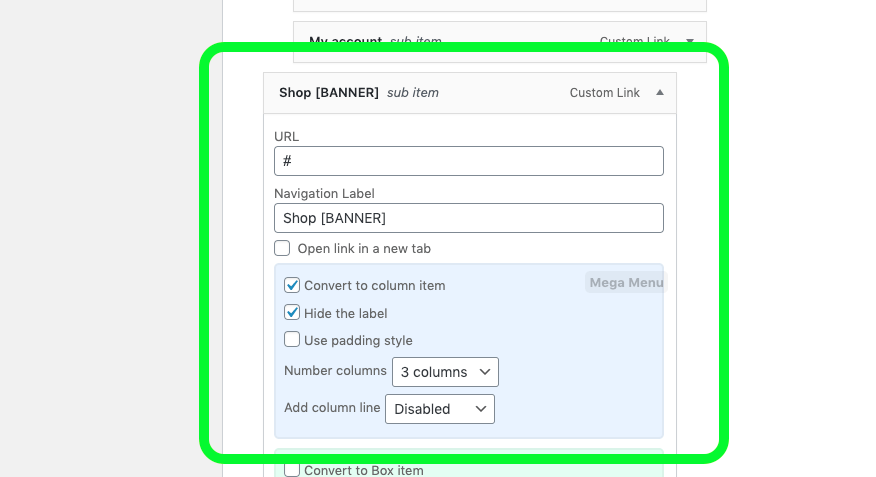
Create a column in your Mega Menu
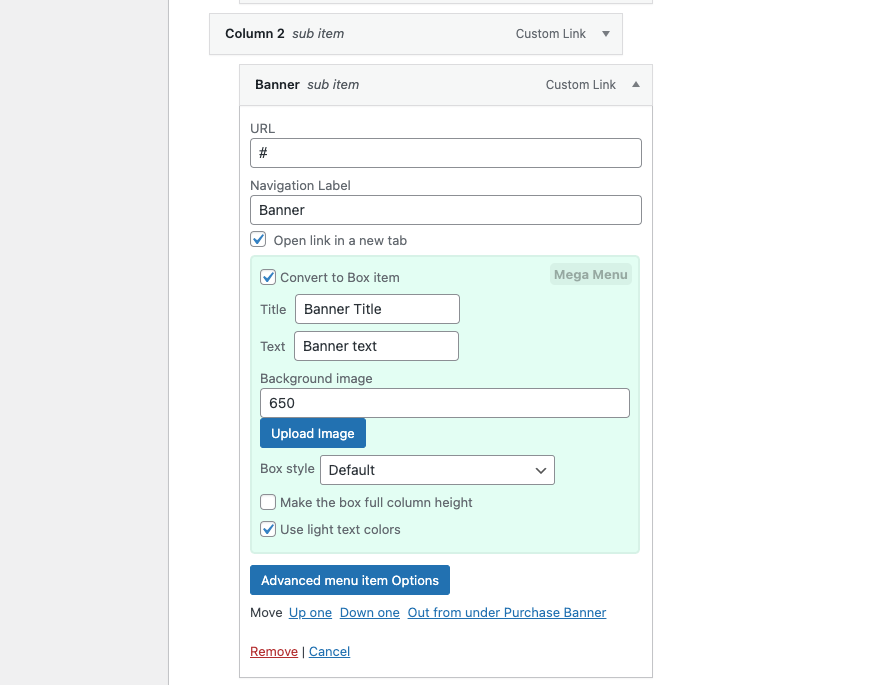
Then add a sub item to that column (this will be the video banner), then check the option Convert to Box item and fill the different fields of the banner.
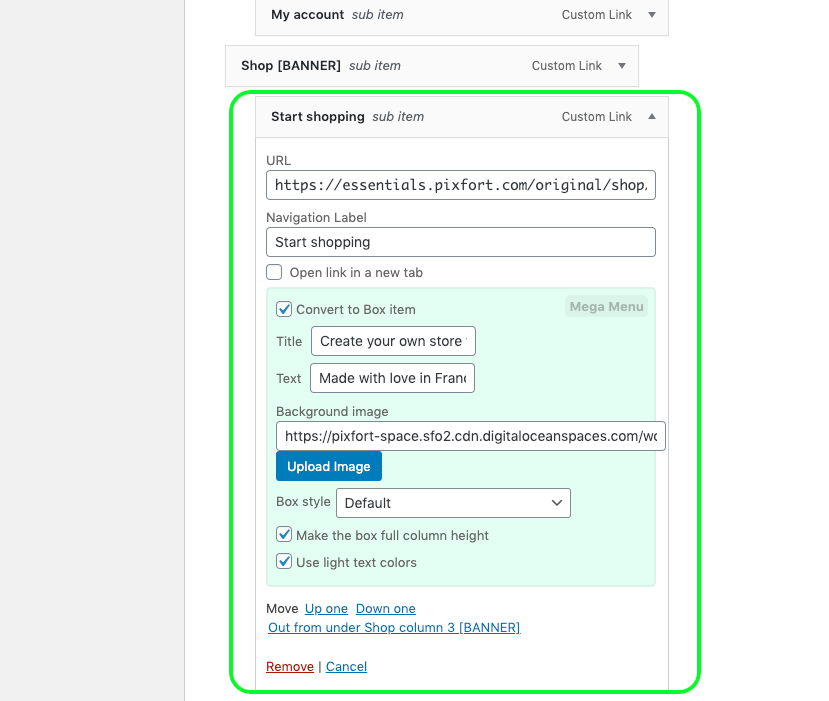
Add a sub item to the column and convert it to Box item
Make sure to check the option Make the box full column height if you want the banner to be full height depending on the height of the tallest column in the Mega Menu.
Note: To add video background you just need to upload your video in MP4 format to your WordPress Media Library and then copy the link and insert it in the Background field in your Menu item (right-click on the background field to avoid opening the Media Library popup).
If you want, you can import Essentials Demo Menu from WordPress Panel > Essentials > Demo Import > Miscellaneous.
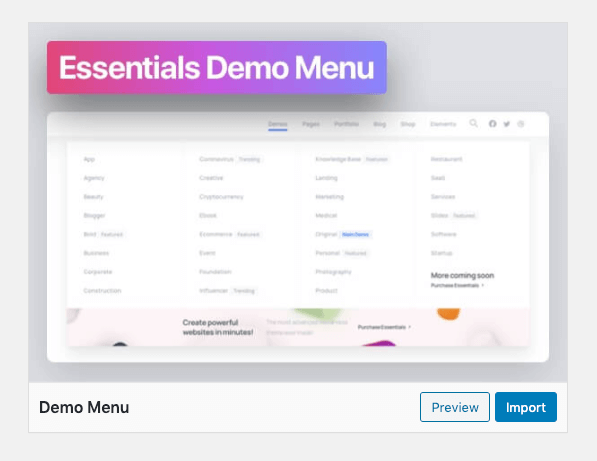
WordPress Panel > Essentials > Demo Import > Miscellaneous
Customizing the menu and dropdown colors is done via the Header Builder, for detailed information about customizing the header colors you can check this article from our knowledge base:
Creating website Header